This is the multi-page printable view of this section.
Click here to print.
Return to the regular view of this page.
Layers
This section covers the layering features when creating effects.
The 3.3 release brings support for layers. Layers are defined at the sequence level and effects belong to a layer. By default a new sequence has one layer called Default and this serves to act the same as things have been in previous releases. Older sequences opening in the 3.3 release will have the default layer and all effects will belong to that layer.
Layers are combined from the highest to the lowest by definable mixers. Each layer you create can have it’s own mixer chosen from the available mixers. Each mixer defines how colors will combine between layers.
To assign an effect to a layer, right click on it in the timeline and navigate to the Layer menu. From there a list of the layer names will appear and you can select the layer to associate the effect to. The menu also will have a check next tot he layer the effect is currently associated with. Hovering over the effect will show a tooltip with effect information. In this tooltip will show the layer the effect is currently associated with.
New effects added to the timeline will be in the Default layer automatically. Copy and pasting effects will retain the layer of the original effect.
1 - Layer Types
This section covers the Layer Types.
Overview
Layers are a method of controlling how seperate Effects on the same element interact with each other. It can be very powerful to create variations on the existing effects. There are several types of Layer Mixers that can be used.
Intensity Overlay
The Intensity Overlay Layer is used to apply the brightness of one effect onto the other Effects in the layer.
Mask
The Mask Layer is used to use one Effect to Mask out parts of other effects.
Mask and Fill
Mask and Fill is very similar to the Mask, except instead of leaving unlit areas where the masking effect is, it will replace those areas with the effect in the Mask and Fill layer.
Color Change
Color Change mixer will replace the colors in other Effects with its own Effect colors.
Proportional Mix
Multiply Color
Luma Key
The Luma Key Mixer matches on brightness and then replaces colors with those in the Layer Effect.
Chroma Key
The Chroma Key Mixer matches on a tolerance of a specific color and replaces that color with the color in the Layer Effect. There are several settings in the configuration to control the behavior of this mixer.
2 - Layer Editor
This section covers the Layer Editor.
Overview
Layers are a method of controlling how seperate Effects on the same element interact with each other. It can be very powerful to create variations on the existing effects. The Layer Editor is the docking window in the Sequencer that controls how the layers are confgured. The layer editor is a docking window like most of the other editor type windows. It can be positioned in any fashion typical of a docking style window. If it is not visible it can be enabled under the View menu in the sequence editor. The menu name is Layer Editor Window.
Layers are stacked in the editor by their order of precedence. Layers on top will be processed first, working down to the default layer at the bottom. The Default layer is fixed and will always be at the bottom. No mixing occurs in this layer.
Editor
Buttons at the top of the editor allow new layers to be added, or selected layers to be deleted. If any effects are associated with a layer when it is deleted, all those effects will be automatically moved to the default layer.
Layers can be reordered by dragging them in the list to the position you want them to be in. In order to drag the layer, you need click in the blue area surrounding the Layer expander. It will highlight in blue as you hover over it.
Expanding the layer provides a way to name the layer as desired as well as change its configration if it has options. The drop down box allows you to choose the type of mixer used to combine color between this layer and the layer below it. If the type of mixer has confguration options, there will be a Configuration button once it is expanded. Clicking on that will bring up the configration dialog for that type.
As you work on your sequence, you may find that you need multiple sets of layers in different orders to accomplish what you need. Keep in mind that layers and their order are applied across the entire sequence.
3 - Layer Mixing
This section covers examples of using Layers.
Intensity Overlay

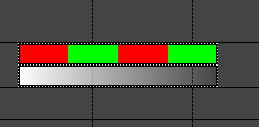
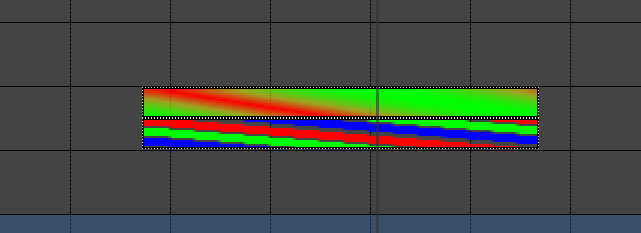
Layers can be used to dim effects that do not currently have a level curve over the entire effect by using the Intensity Overlay mixer in a defined layer. As shown below the white pulse is in the Intensity Overlay layer and the Alternating is in the Default layer. The alternating effect will fade out in relation to the ramp on the pulse effect. The color of the pulse is not important on full color elements.

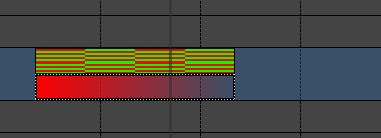
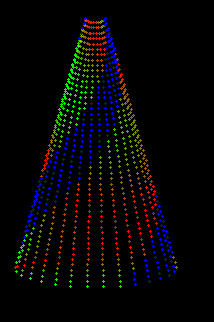
On discrete items that have color defined, the same principle applies with a bit of a spin. Here I am placing this on some led string lights with defined color. There are multiple strings of Red, Green, and Blue. Here I am alternating from red to green. I have added a red pulse to the intensity overlay layer. Here the red lights will dim as they match the red of the pulse. The green will stay at full intensity.

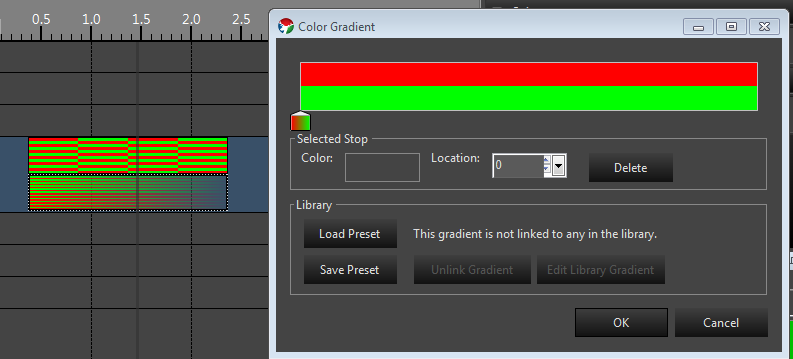
To dim both colors I add green to the pulse.
Mask


The Mask mixing method allows you to mask out areas of an effect with another effect. You can accomplish this in a similar manner as depicted above. Areas that are lit in the layer that has a the Mask mixer will turn off areas in the effect in the layer beneath it. One example of this is a spiraling butterfly effect. By placing a Spiral effect in the Mask layer and a Butterfly effect in the default layer, the lit spirals in the Spiral effect will create spiral cut outs in the Butterfly. This gives the effect of Spirals where the spokes have the Butterfly pattern on them. The colors of the spirals themselves are irrelevant for using it as a mask. You really only need one color and you configure the spirals to the look you want. The example below was created by just dropping the two effects with defaults, mining them up and setting the spiral to the layer that has a Mask mixer setup.
Mask and Fill
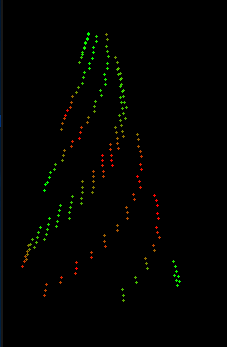
Mask and fill is very similar to the Mask mixing, except instead of leaving unlit areas where the masking effect is, it will replace those areas with the effect in the Mask and Fill layer. In the spiral example above, the colored spirals in the Spiral effect will be visible and replace those areas of the Butterfly. Thus you end up with a spiral overlaid on the Butterfly. Without layering, these would mix and give mixed results. Here you get the exact colors of the Spiral on top of the Butterfly effect so in this case the colors are relevant and you can configure them as needed to obtain the effect you want. Here is how this looks in the preview. I used one color of blue and I reduced the thickness of the spiral by about half to get this look.

Conclusion
These are just simple examples of the power of layers. There are other mixers that allow for combining in many different ways. Layers are also cumulative, so you can mix multiple effects in higher layers to affect lower layers. We will be adding more in the future as need arise.
Tutorials
Videos
